 rumaruma
Kitchen Renovation in Malaysia: The Complete Guide to Layout, Cabinets, Countertops and Cost
Every decision in a Malaysian kitchen renovation, in the order to make them — from wet and dry zones to cabinets, countertops, the cooker hood and the final bill.
On this page
- What a Kitchen Renovation in Malaysia Costs
- Step 1: Decide How You Cook — Wet Kitchen, Dry Kitchen or Both
- Step 2: Plan the Kitchen Layout
- Step 3: Sort Out Plumbing, Gas and Electrical Points Before Carpentry
- Step 4: Choose Your Kitchen Cabinets
- Step 5: Pick a Countertop That Suits Malaysian Cooking
- Step 6: Get the Cooker Hood and Hob Right
- Step 7: Backsplash, Flooring and Finishes
- Kitchen Renovation in Malaysia: The Order of Works
- Before You Sign the Kitchen Quotation
You’ve saved forty kitchen photos, your contractor wants to know “melamine or plywood?”, and the cabinet shop is asking for a hob model before you’ve even agreed on where the sink goes. Every decision seems to depend on another one. That’s normal, and it’s the reason so many kitchens end up redone two years later.
A kitchen renovation in Malaysia goes smoothly when you make the decisions in the right order: how you cook first, then the layout, then the services hidden in the walls, and only then cabinets, countertop and finishes. This guide walks through each step, what it costs, and where Malaysian kitchens usually go wrong.
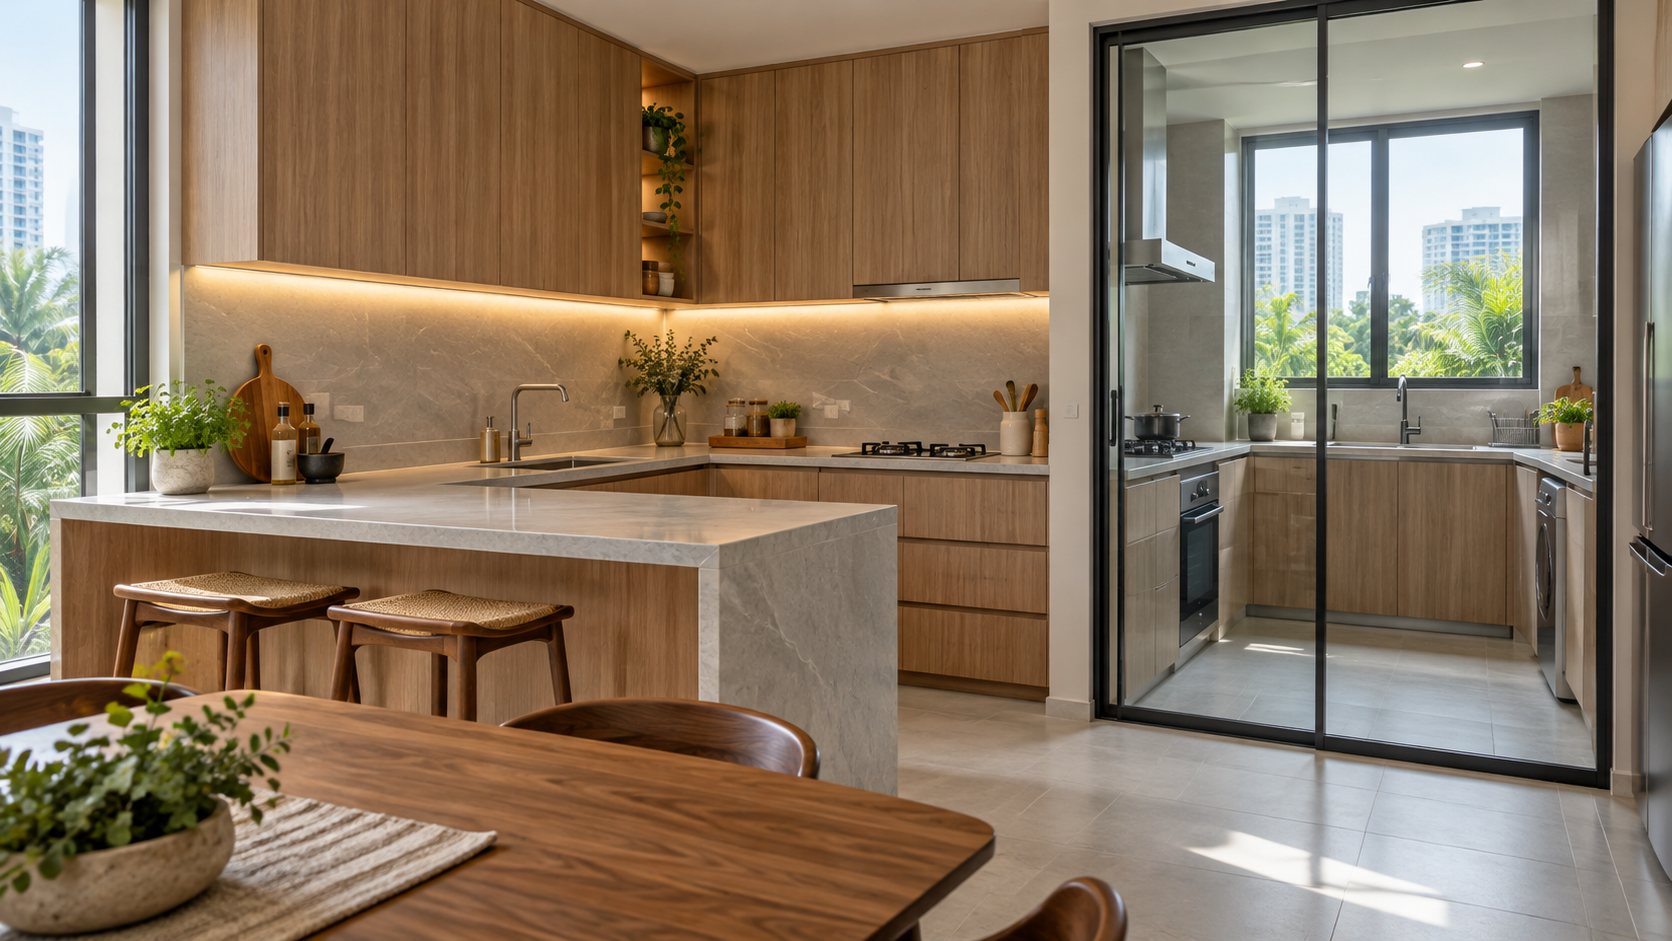
What a Kitchen Renovation in Malaysia Costs
Most Malaysian kitchens land between RM15,000 and RM55,000, and premium kitchens with full appliance packages can pass RM100,000. The kitchen is usually the most expensive room in the house per square foot, because cabinets, countertop, plumbing, gas, wiring and extraction all meet in one small space.
| Kitchen level | What it usually includes | Appliances | Typical cost |
|---|---|---|---|
| Basic | New melamine or laminate cabinets, compact countertop, basic sink and tap, no layout change | Usually not included | RM15,000 – RM25,000 |
| Mid-range | Semi-custom cabinets, engineered stone countertop, new tiling, minor plumbing changes | Sometimes a hood and hob; check the quote | RM28,000 – RM55,000 |
| Premium | Full custom cabinetry, quartz or sintered stone throughout, island, layout change | Usually a built-in appliance package | RM60,000 – RM120,000+ |
These bands describe a typical condo or terrace kitchen. A compact condo kitchen with one short run of cabinets, around 8–10 ft, usually sits at the low end of its band; a long landed kitchen with a second run or an island sits at the top. Free-standing items like the fridge and washing machine are not counted in any band.
Prices are for reference only, as of October 2026. Kitchen size, cabinet material, countertop choice, how much hacking and plumbing is involved, appliances, and your contractor’s location and workload all change the final figure.
Two kitchens of the same size can differ by RM30,000 on materials alone. Laminate cabinets with a compact stone top and solid plywood cabinets with a full sintered stone run look similar in a 3D render. The quotation tells a different story. For how the kitchen fits into a whole-home budget, see our home renovation cost guide for Malaysia.
Step 1: Decide How You Cook — Wet Kitchen, Dry Kitchen or Both
Start with the cooking, not the cabinets. A household that stir-fries in a wok every night needs a very different kitchen from one that mostly reheats, makes coffee and orders in.
- Wet kitchen — The heavy-duty zone: gas hob, wok frying, deep-frying, boiling, washing. It needs strong extraction, a floor that can take water, and surfaces that shrug off oil and heat.
- Dry kitchen — The light zone: coffee machine, microwave, toaster, plating, often an island or breakfast counter facing the dining area. It’s the part guests see.
- One combined kitchen — Common in smaller condos. It works when the cooking is light or the extraction is excellent.
Many Malaysian homes keep the wet kitchen enclosed and the dry kitchen open, sometimes with a glass sliding door between them. Our guide to open kitchen vs closed kitchen in Malaysia covers that choice in detail, including what hacking the kitchen wall involves.
Answer this one question honestly before anything else: who cooks, how often, and how much smoke does it make? Everything below follows from it.
Step 2: Plan the Kitchen Layout
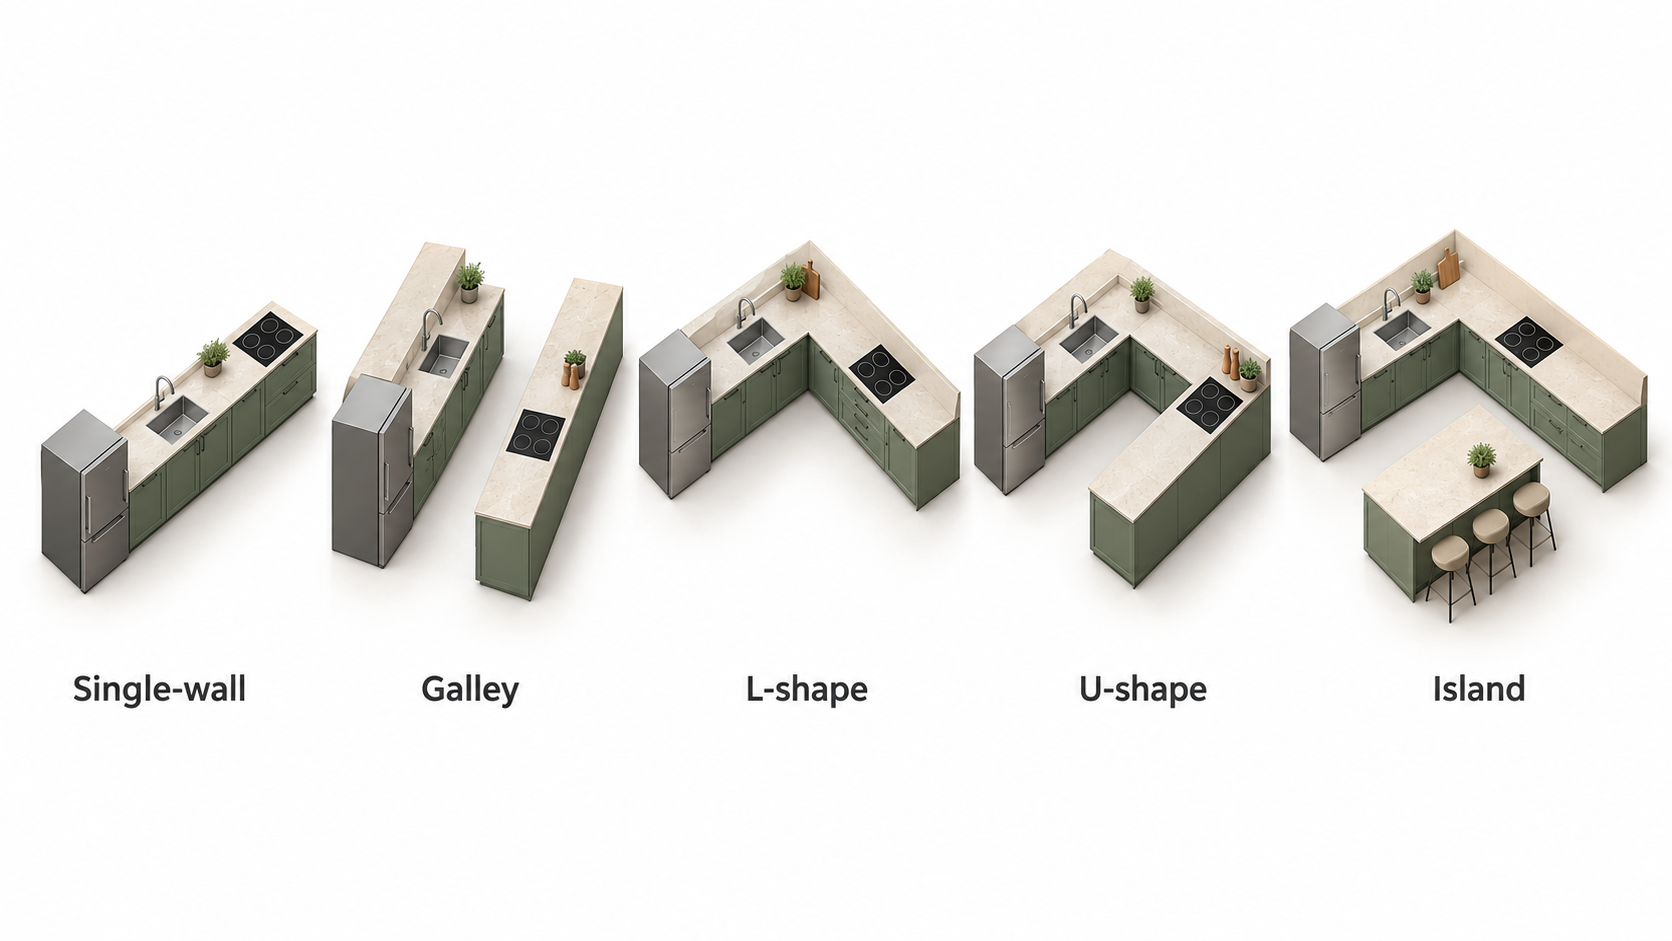
The layout decides how many steps you take while cooking and how much counter space you actually get. Malaysian kitchens usually take one of five shapes.
| Layout | Best for | Watch out for |
|---|---|---|
| Single-wall (I-shape) | Small condos and studios | Little counter space; plan tall storage to make up for it |
| Galley (two parallel runs) | Narrow condo kitchens | Keep at least 1m between runs so two people can pass |
| L-shape | Most mid-sized condos and terraces | The corner cabinet wastes space without a proper corner fitting |
| U-shape | Larger landed kitchens | Can feel boxed in; keep one end open where possible |
| With island | Open dry kitchens in landed homes or large condos | Needs about 1m clear on every side, and power at the island |
Whatever the shape, keep the sink, hob and fridge close enough to move between easily, with clear counter space between the sink and the hob. That stretch is where most of the chopping and plating happens, and it’s the one that gets squeezed when an oven tower or a tall fridge goes in the wrong place. Our step-by-step kitchen layout guide explains the work triangle and work zones in detail.
Standard kitchen measurements to check on the drawing
- Countertop height — usually around 850–900mm. Taller cooks may want the higher end; ask before the carcass is built.
- Countertop depth — about 600mm (2 ft), which fits standard sinks and hobs.
- Wall cabinet height — the bottom of the wall cabinets often sits around 600–750mm above the counter. Check your hood’s manual for its own minimum height above the hob.
- Walkway — at least 1m in front of the counter, more if two people cook together.
If reading the drawing itself is the hard part, our guide on how to read a renovation floor plan explains the symbols and measurements.
Step 3: Sort Out Plumbing, Gas and Electrical Points Before Carpentry
This is the step homeowners skip, and the most expensive one to fix later. Once the cabinets and countertop are in, moving a pipe or adding a power point means removing finished work.
- Sink and water points — Moving the sink means rerouting water and drainage pipes, which can involve hacking the floor or wall. Get it priced as its own line item rather than accepting it inside a lump sum.
- Gas — Whether you use piped gas or a gas cylinder, any change to the gas line should be done by a competent gas contractor, not a general worker. In condos, the Joint Management Body (JMB) or Management Corporation (MC), which manages the building and its renovation rules, may restrict where the gas point and hob can go.
- Power points — Count every appliance you’ll actually use: fridge, rice cooker, kettle, microwave, air fryer, coffee machine, water filter, dishwasher. Then add two spare. Heavy appliances like ovens and induction hobs need their own dedicated circuits.
- Hood duct route — Decide where the cooker hood will discharge before the wall cabinets are drawn. More on this in Step 6.
A kitchen with too few power points ends up with extension cords running across a wet counter. In a room with water, heat and oil, that’s the one shortcut not worth taking.
Lock in your appliance models before the cabinet drawings
This is why the cabinet shop asks for your hob model so early. Built-in appliances decide the size of the openings in the cabinets and countertop, and where pipes, gas and power must end up. Choose the actual models for the hob, hood, oven, sink, dishwasher and built-in fridge before you approve the cabinet drawings, then give your designer or carpenter each one’s installation sheet. For each appliance, confirm:
- Dimensions and cut-out size — the opening the cabinet or countertop must have, which often differs from the appliance’s outside size
- Clearances and ventilation — gaps the manual requires around ovens, built-in fridges and under the hob, and the hood’s height above the hob
- Service connections — where the power point, dedicated circuit, gas point, water inlet or drain needs to sit
Changing to a bigger hob after the stone is cut means a new countertop, not an adjustment.
Step 4: Choose Your Kitchen Cabinets
Cabinets take the biggest share of most kitchen budgets. Malaysian quotations usually price them per foot run — the length along the wall — with base, wall and tall cabinets priced separately. For melamine and plywood carcasses, published rates run from roughly RM200 to RM450 per foot run, depending on cabinet type and material, and aluminium costs more.
Rates are for reference only, as of October 2026. Carcass material, door finish, hardware, cabinet height and your carpenter’s location all change them.
The choice has two separate parts, and quotations often blur them together.
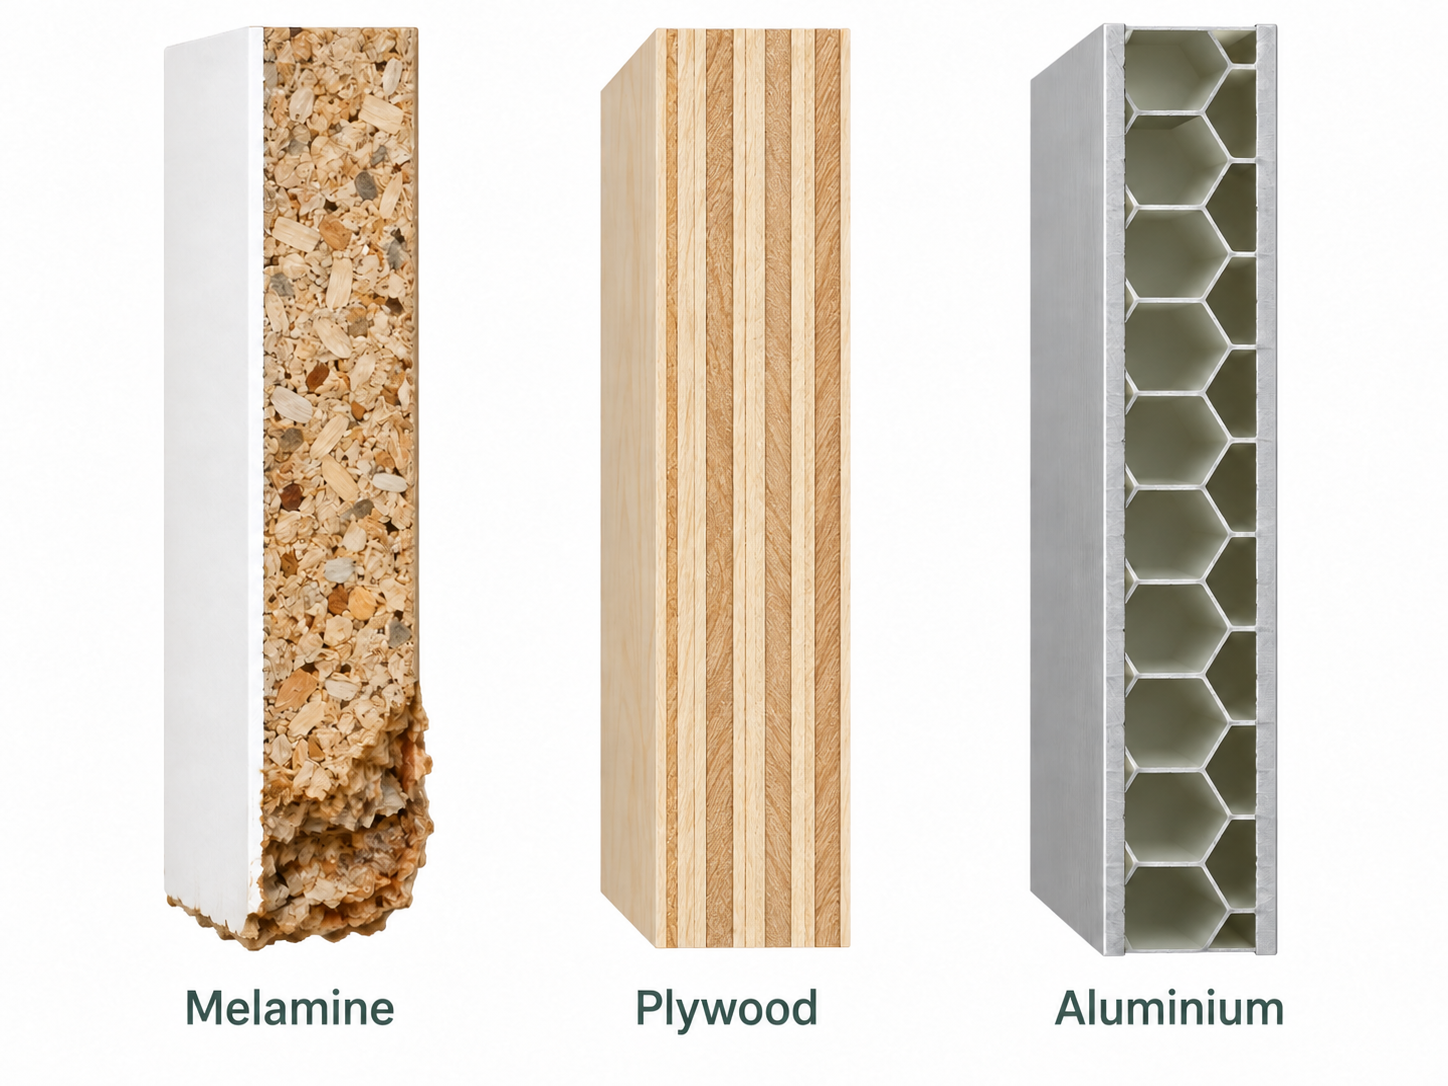
The carcass (the box)
- Melamine-faced particleboard — The most affordable. Fine for a dry kitchen and wall cabinets. Its weakness is water: once moisture gets into an edge, the board swells and doesn’t recover. Avoid it under the sink.
- Plywood — Stronger and more tolerant of the occasional splash. The common mid-range choice for base cabinets in a wet kitchen.
- Aluminium — Doesn’t swell or rot, and termites can’t eat it. Popular for wet kitchens and the cabinet under the sink. It costs more and can feel less solid when doors are slammed.
For prices per foot run and where each material belongs, see our kitchen cabinet materials comparison.
The door finish (what you see)
- Melamine or laminate — Hard-wearing, easy to wipe, huge range of colours and woodgrains.
- 4G glass or acrylic — Glossy and modern; shows fingerprints and fine scratches. “4G glass” is a Malaysian trade name for glass-fronted doors in a slim aluminium frame; the number refers to the product generation, not a technical standard.
- Spray paint — Smooth and seamless; chips are harder to touch up.
Ask for the carcass material and the door finish to be written separately on the quotation. A line that just says “kitchen cabinet, 10 ft” can mean either.
Step 5: Pick a Countertop That Suits Malaysian Cooking
The countertop takes the most abuse: hot woks, turmeric, soy sauce, calamansi juice and daily scrubbing. Choose for how you cook, not only how it looks in the showroom.
| Material | Strengths | Weaknesses | Don’t use it if… |
|---|---|---|---|
| Quartz (engineered stone) | Non-porous, consistent colour, wide range of designs | Can scorch or discolour under a very hot pot | You often put a wok straight from the flame onto the counter |
| Sintered stone | Heat- and stain-resistant, no sealing needed | Edges and corners can chip; fabrication must be precise | You want a thick, chunky edge at a budget price |
| Granite | Heat-resistant, hard-wearing | Needs sealing; limited, busier patterns | You want a soft, plain modern look |
| Solid surface | Seamless joins, repairable | Scratches and can mark under heat | You cook heavily with high heat |
| Natural marble | Unmatched natural veining | Etches under acids like calamansi and vinegar; stains | It’s the main cooking counter in a wet kitchen |
Sintered stone starts from around RM110 per sq ft installed for regular China-made slabs, with cut-outs for the sink and hob charged extra. Our honest look at whether sintered stone is worth it in Malaysia covers its prices, durability and the chipping risk in detail. Quartz starts at a similar price; see quartz countertops in Malaysia for its grades and what to check in a quote. Torn between them? See sintered stone vs quartz for which suits a wet or dry kitchen.
Prices are for reference only, as of October 2026. Brand, slab size, thickness, edge profile and the number of cut-outs all change the final price.
The countertop is templated after the base cabinets are installed, then fabricated off-site. Budget about two weeks between templating and installation, and don’t let anyone measure for stone before the carcass is fixed in place.
Step 6: Get the Cooker Hood and Hob Right
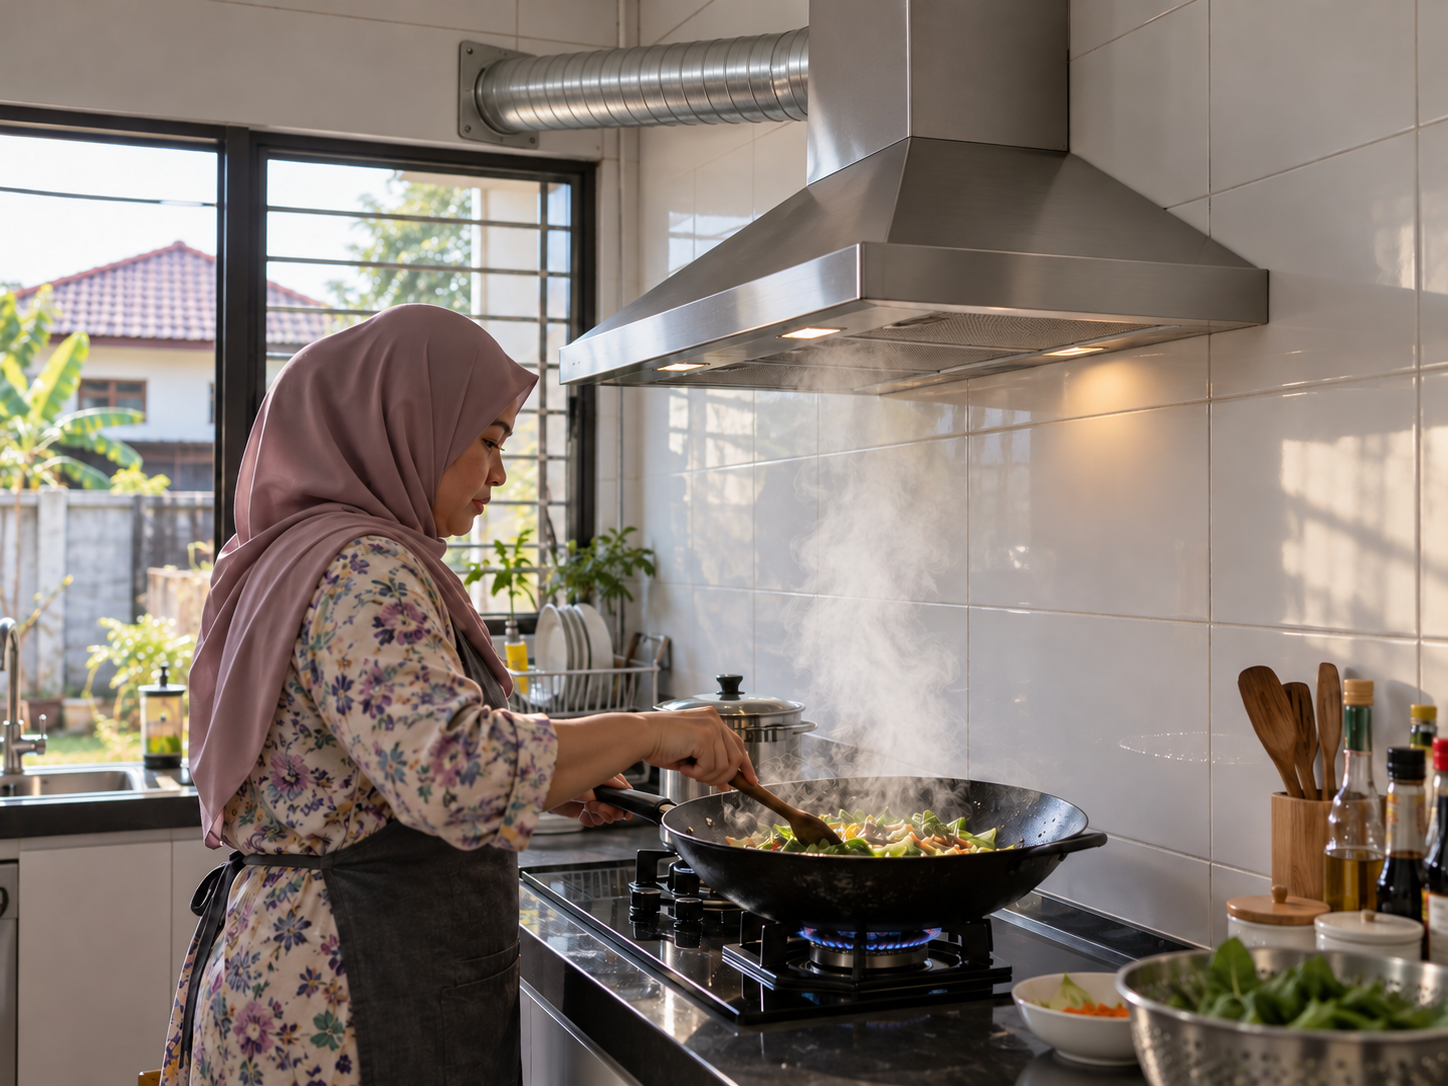
In a Malaysian kitchen, the hood matters more than the hob. A good hob with a weak hood still leaves oil on the ceiling and the smell of fried fish in the bedroom.
- Ducted beats recirculating — A ducted chimney hood pushes smoke and oil outside. A recirculating hood only filters the air and blows it back into the room, which is rarely enough for wok frying.
- Check suction — Mid-range chimney hoods at major electrical retailers are rated around 1,000–1,500 m³/h. Compare models in the shop, since brands measure differently.
- Plan a short duct — A short, straight duct to an external wall or window works best. Every bend weakens suction.
- Check condo rules — Many JMBs and MCs don’t allow new openings in the external wall, so the duct may have to use an existing window or opening.
At major electrical retailers, chimney hoods cost from about RM900 to RM4,000 for the unit alone; ducting and installation are extra. Many households pair a gas hob in the wet kitchen with an induction hob in the dry kitchen, so the open side stays cleaner. Plan both power and gas points in Step 3. For hood types, suction, filters and what to check on each hob, see our guide to choosing a cooker hood and hob.
Step 7: Backsplash, Flooring and Finishes
The backsplash is the strip of wall between the countertop and the wall cabinets. In a wet kitchen, it gets splashed with oil every day, so choose something you can wipe clean in one pass.
- Ceramic or porcelain tiles — Affordable and durable. Larger tiles mean fewer grout lines to scrub.
- Same stone as the countertop — A continuous slab looks seamless and has no grout at all, at a higher cost.
- Tempered glass — Easy to clean and good for colour, but shows every splash mark.
For more options, prices and which material suits the wall behind a wok, see our kitchen backsplash ideas.
For the floor, use non-slip tiles in the wet kitchen and make sure the floor slopes slightly towards the floor trap (the floor drain), so water doesn’t pool. If the wet kitchen floor is being retiled or the layout changes, check that waterproofing is included, especially in condos where a leak becomes your downstairs neighbour’s ceiling stain.
This is where a kitchen starts to feel like yours. A warm timber-look cabinet against a pale stone counter, a strip of under-cabinet lighting that makes the evening washing-up feel less like a chore, a window ledge with a pot of curry leaves. If you’re drawn to a greener, more natural look, our biophilic kitchen design guide shows how plants and natural materials can work in a Malaysian kitchen.
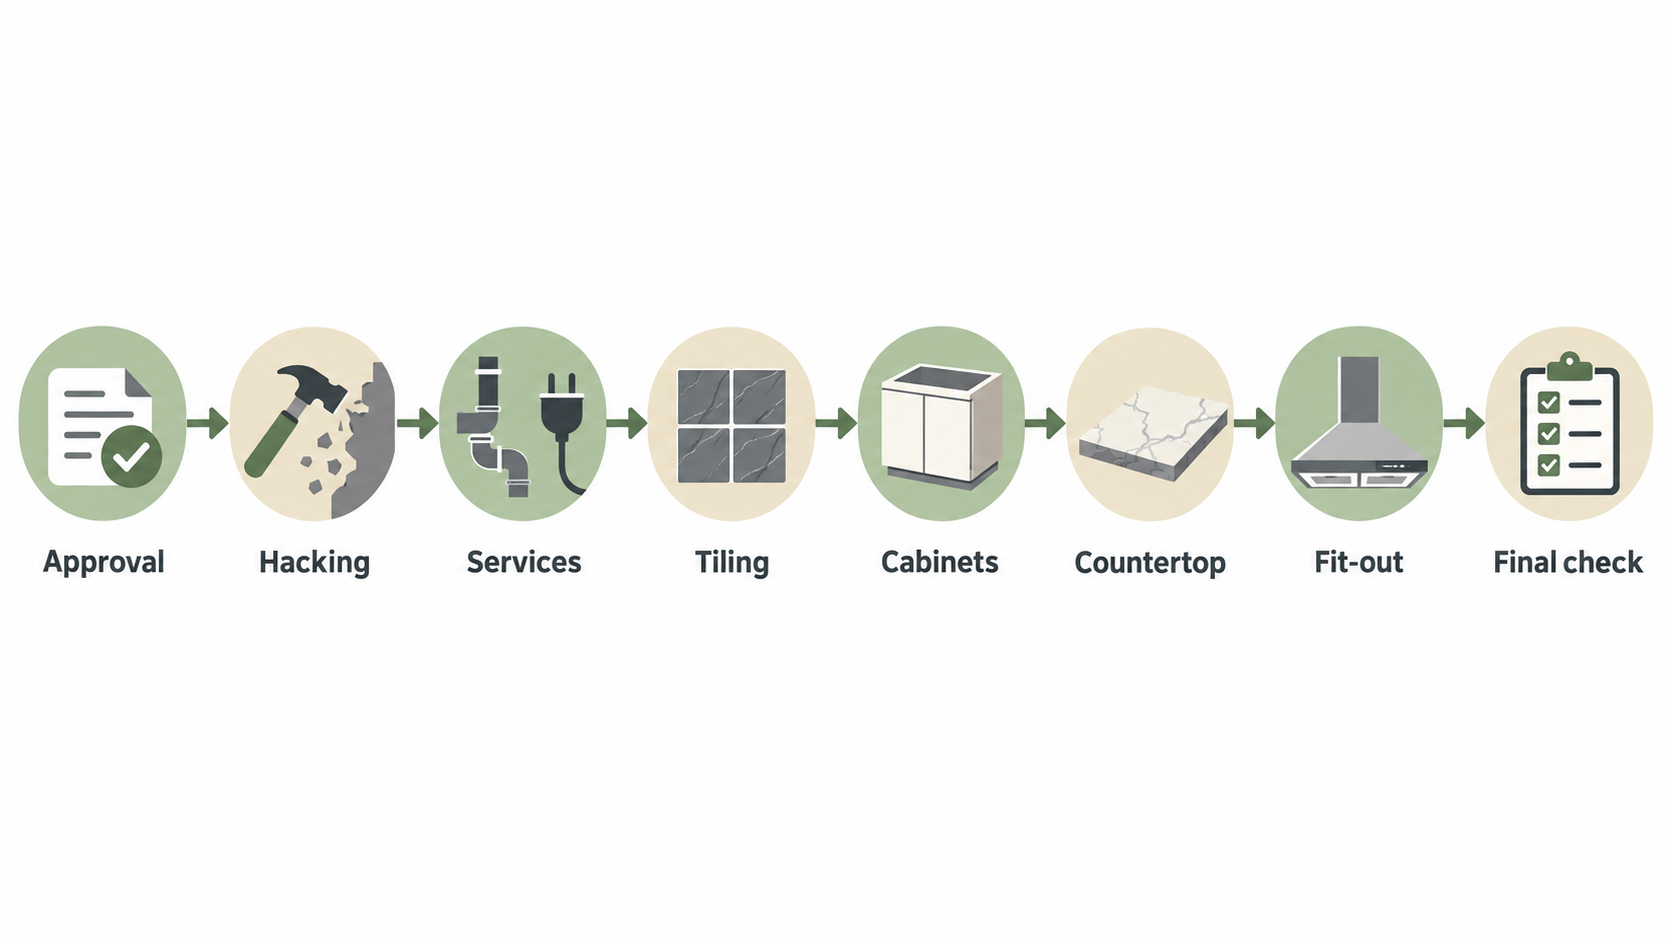
Kitchen Renovation in Malaysia: The Order of Works
Contractors sequence kitchen work to protect what’s already finished. Knowing the order helps you spot when something is being done too early.
- Approval — For condos, submit your renovation application to the JMB or MC and pay the renovation deposit before any work starts. Our guide to condo renovation rules in Malaysia explains the approvals, deposits and working hours.
- Hacking and demolition — Old cabinets, tiles and any walls being removed.
- Plumbing, gas and electrical — Pipes, gas line and wiring run while walls and floors are open.
- Waterproofing and tiling — Wet kitchen floor first, then the general wall tiling outside the cabinet areas.
- Base and wall cabinets — Measured after tiling, so they fit the finished walls.
- Countertop — Templated on the installed carcass, then fabricated and fitted.
- Backsplash, hood, hob and sink — Fitted once the countertop is in. A tiled backsplash usually goes up now, so the tile cuts line up with the countertop and wall cabinets. A stone backsplash is often templated and cut together with the countertop. If the walls are tiled floor to ceiling before the cabinets go in, there’s no separate backsplash step; agree which approach you’re using with your contractor.
- Appliances and final check — Test every tap, power point and the hood before final payment.
A straightforward kitchen typically takes about four to eight weeks from hacking to handover. Cabinet fabrication and stone lead times are the usual causes of delay.
Before You Sign the Kitchen Quotation
Use this checklist when you have a kitchen design and quotation in hand:
- The cooking habits of the main cook are reflected in the wet and dry kitchen layout
- Sink, hob and fridge positions are fixed on the drawing, with counter space between the sink and the hob
- Appliance models are chosen, and the drawings match their cut-out sizes, clearances and service points
- Plumbing, gas and electrical changes are listed as separate line items
- Every power point is marked, including dedicated circuits for oven and induction hob
- Carcass material and door finish are written separately for base, wall and tall cabinets
- Countertop material, thickness, edge profile and cut-outs are specified
- The hood is ducted, and the duct route is confirmed with your JMB or MC
- Waterproofing is included wherever the wet kitchen floor is retiled
- Hinges and drawer runners are named, with warranty terms
- The timeline allows for cabinet and countertop fabrication
When comparing two or three kitchen quotes, line them up item by item; our guide to comparing renovation quotations in Malaysia shows what’s often left out.
Get those things settled and the rest of the kitchen becomes the enjoyable part: choosing the colour of the cabinet doors, the shape of the tap, the light over the island. A kitchen that’s planned around how you really cook stays easy to use and easy to clean long after the renovation is done.