 rumaruma
How to Plan a Kitchen Layout for a Malaysian Home (Work Triangle Explained)
Where the sink, hob and fridge should go, how the work triangle works, and how to adapt it to wet and dry kitchens and small condo galleys.
On this page
- What the Kitchen Work Triangle Actually Is
- Where the Work Triangle Falls Short in Malaysian Kitchens
- Think in Work Zones, Not Just a Triangle
- How to Plan a Kitchen Layout in 7 Steps
- Planning a Layout Around a Wet and Dry Kitchen
- Applying the Work Triangle to Each Kitchen Shape
- What Kitchen Layout Changes Cost
- For Carpenters and Renovators
- Before You Approve the Kitchen Layout
Your designer has sent three kitchen layouts, and they all look fine on paper. The cabinets line up and the 3D render is lovely. But you can’t tell which one will have you walking back and forth with a dripping wok, or which one puts the fridge door where it smacks into whoever is washing up.
That’s what learning how to plan a kitchen layout is really about: not the shape of the cabinets, but where the sink, the hob and the fridge sit in relation to each other and to you. This guide explains the work triangle designers talk about, where it stops working in Malaysian kitchens, and the step-by-step order to place everything so the kitchen is easy to cook in for the next 15 years.
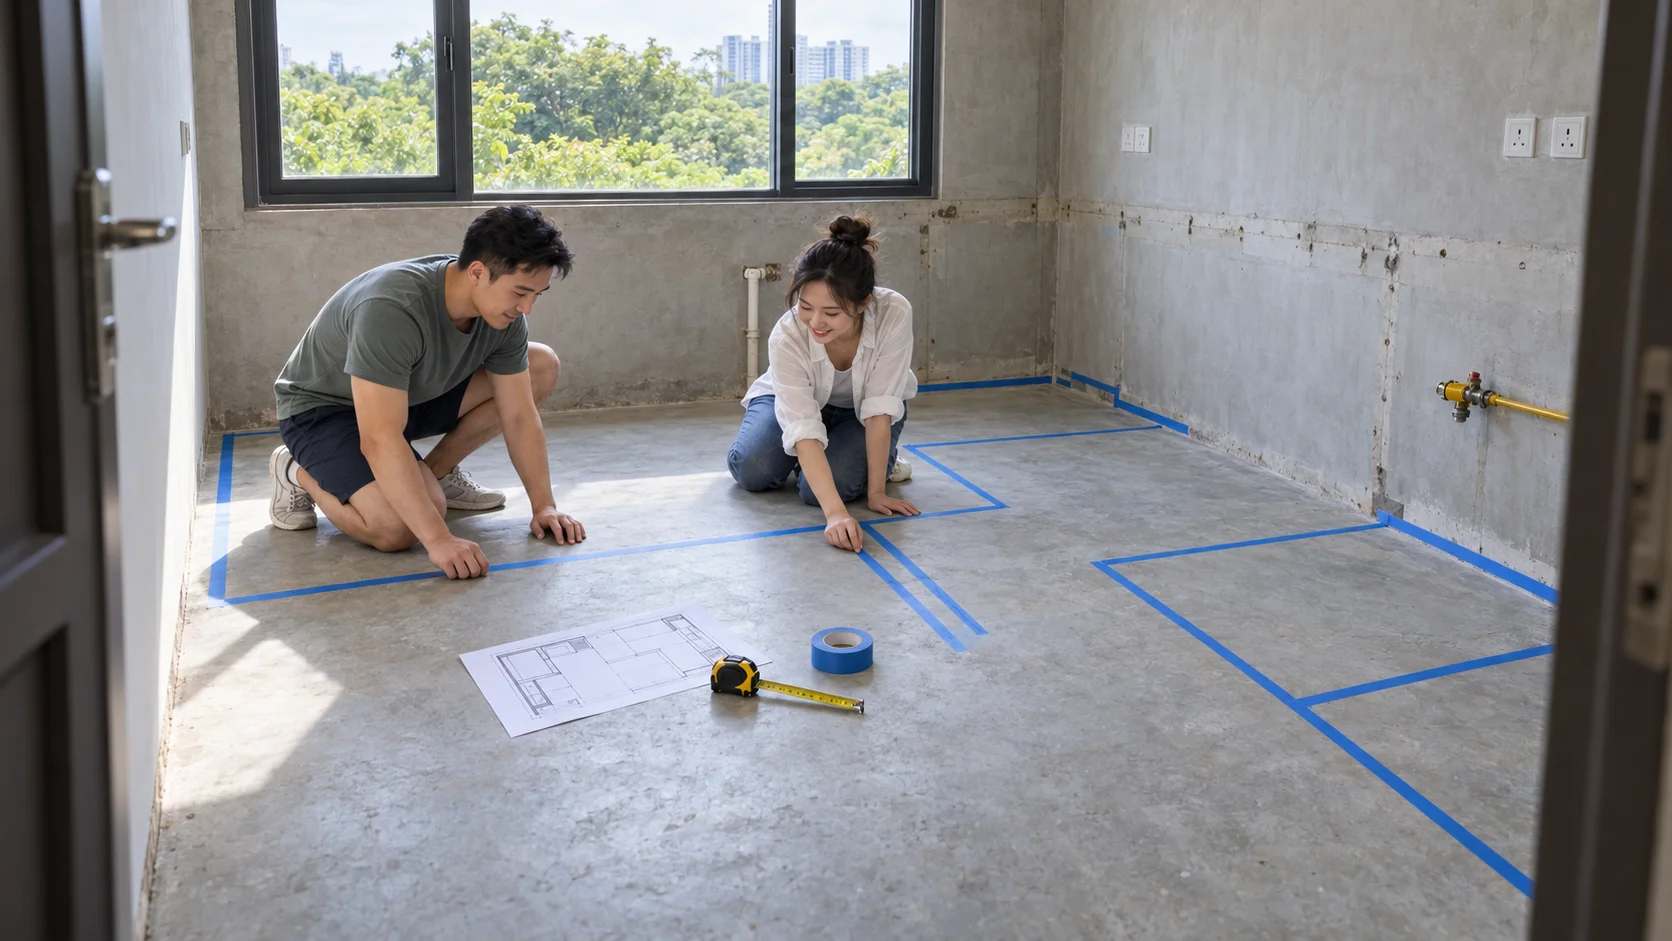
If you’re still deciding on cabinets, countertops and budget, start with our complete kitchen renovation guide for Malaysia, which covers the five kitchen shapes and every decision in order. This article goes deeper on one of them: the layout.
What the Kitchen Work Triangle Actually Is
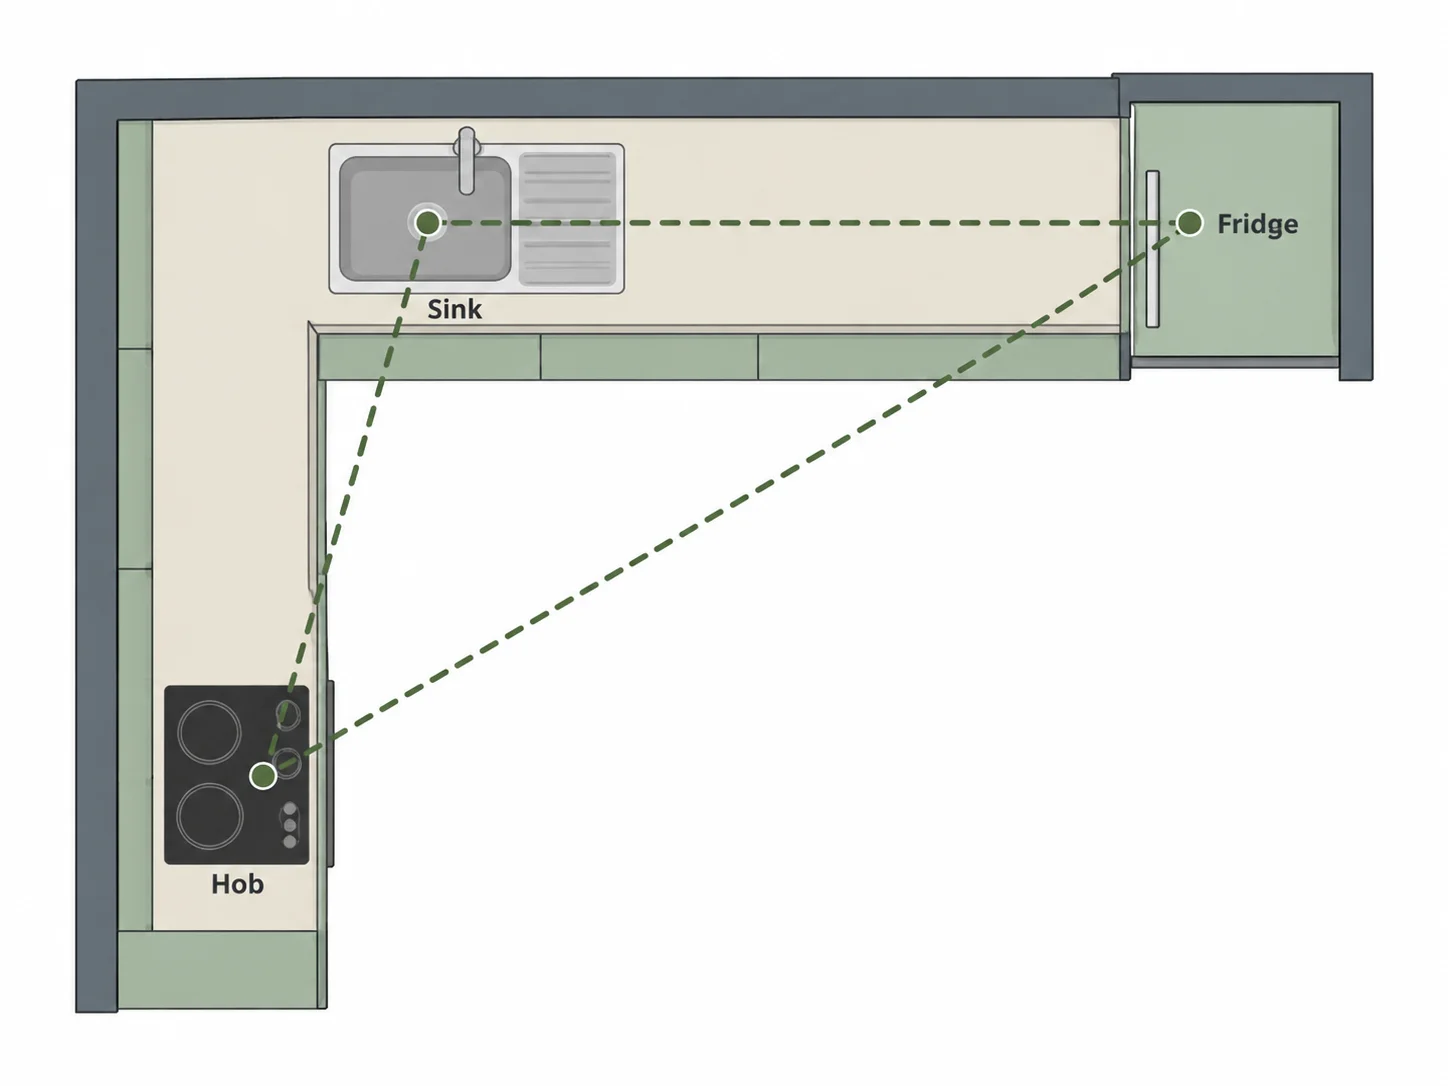
The kitchen work triangle is the imaginary triangle you draw between the three spots you use most: the sink, the hob and the fridge. Almost every cooking task moves between these three. You take food from the fridge, wash and cut it near the sink, then cook it on the hob.
The idea is simple. If the three points sit too far apart, you walk too much. If they’re too close, you have no counter space between them and you keep bumping into the fridge door. The guideline most kitchen designers use, from the US-based National Kitchen & Bath Association (NKBA), puts numbers on it:
| Work triangle guideline | Imperial | Metric (rounded) |
|---|---|---|
| Each side of the triangle | 4–9 ft | 1.2–2.7m |
| All three sides added together | 26 ft or less | 7.9m or less |
| How far a side may cut across an island or peninsula | 12 in or less | 300mm or less |
| Household traffic | Shouldn’t pass through the triangle | — |
Measure each side from the centre of the sink, the centre of the hob and the middle of the fridge’s front. These are design guidelines, not a Malaysian building standard, so nobody will reject your plan for missing them by a few centimetres. They’re a quick way to check that a layout won’t tire you out.
Where the Work Triangle Falls Short in Malaysian Kitchens
The triangle was designed in the 1940s for one cook, three appliances and a single closed kitchen. Many Malaysian homes don’t look like that.
- The fridge sits outside the cooking area. In a home with a wet and dry kitchen, the fridge usually stands in the dry kitchen or near the dining area, while the gas hob and the main sink are in the wet kitchen behind a wall or glass door. There’s no tidy triangle to draw.
- More than three things need a spot. A rice cooker, kettle, water filter, air fryer and microwave are used every day in most Malaysian homes. Each needs counter space and a power point, and the triangle says nothing about them.
- Two people cook at once. When a parent stir-fries while someone else cuts fruit or washes up, one triangle becomes two people getting in each other’s way.
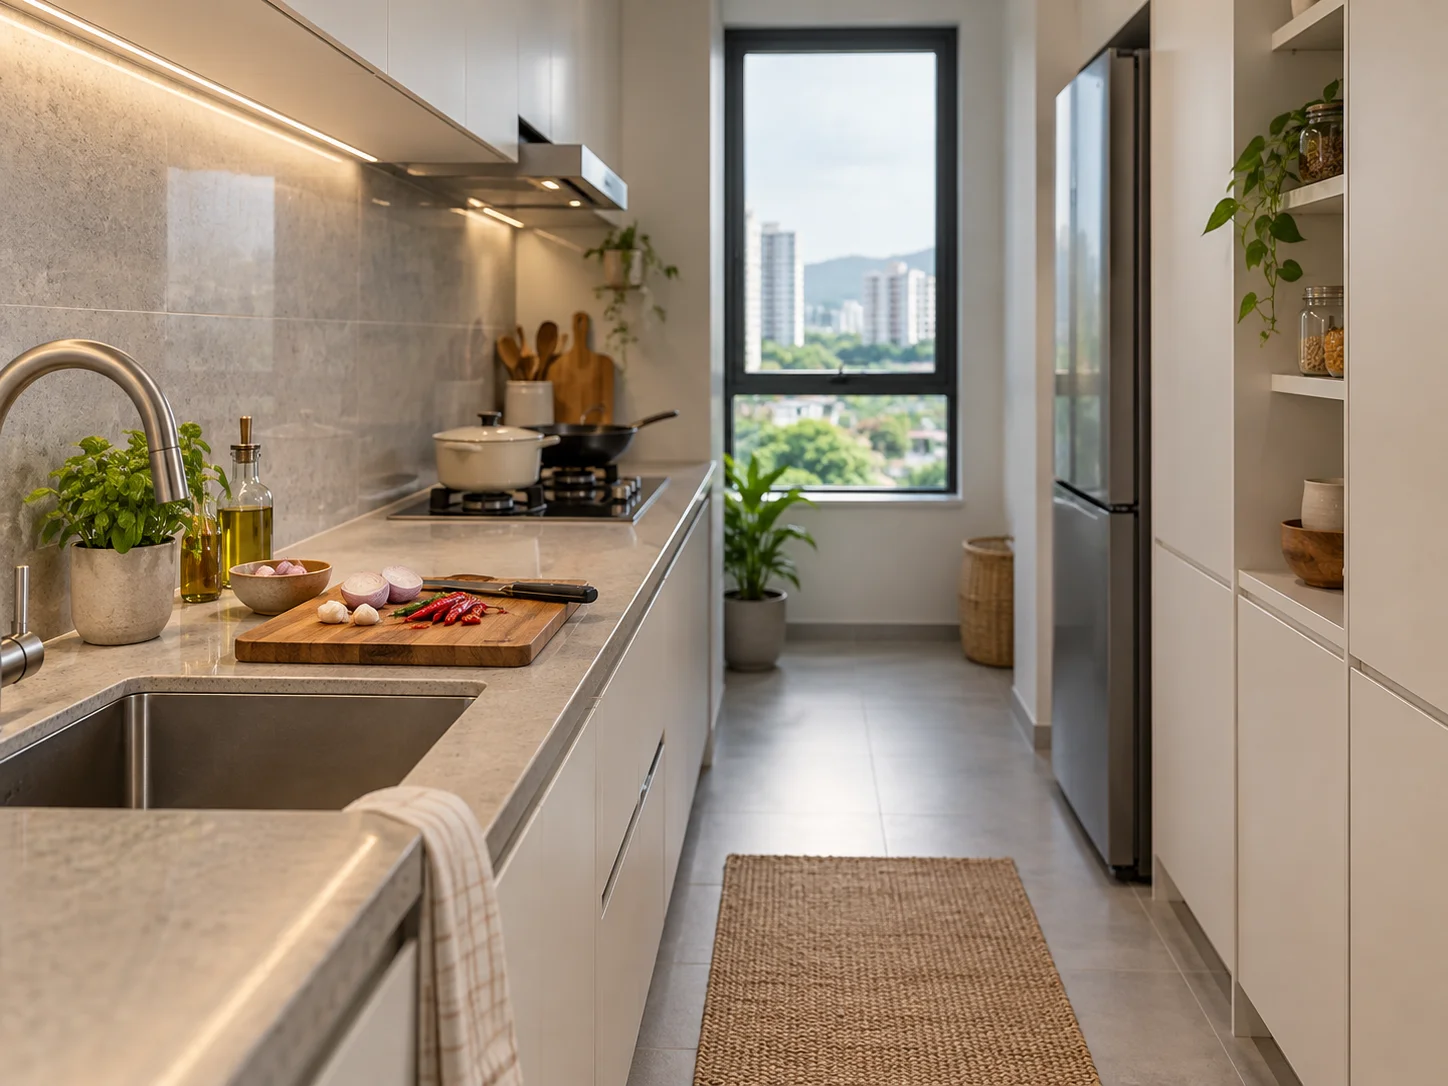
- The kitchen is too small for a triangle. In a single-wall condo kitchen, the sink, hob and fridge sit in one straight line. The triangle flattens into a line, and what matters is the order of things along it.
So treat the triangle as a first check, not the whole plan. The more useful idea for most Malaysian homes is work zones.
Think in Work Zones, Not Just a Triangle
Kitchen work zones group everything you need for one type of task in one area. Instead of three points, you plan four or five areas laid out in the order you actually cook:
- Storage zone — fridge, pantry and dry goods. Put it at the edge of the kitchen so family members can grab a drink without walking through the cooking area.
- Cleaning zone — sink, dish rack, dishwasher if you have one, and the bin. Plates come back here from the dining table, so keep it close to the dining side.
- Preparation zone — the longest clear stretch of counter, ideally between the sink and the hob. This is where chopping, marinating and plating happen.
- Cooking zone — hob, cooker hood, oven, and drawers for woks, ladles and sauces within arm’s reach.
- Small appliance zone — a stretch of counter, or an appliance cabinet with a roller shutter or lift-up door, for the rice cooker, kettle and air fryer, with its own power points.
Lay the zones out in the order storage, cleaning, preparation, cooking, and food moves in one direction: from the fridge, to the sink, to the board, to the wok. If the main cook is left-handed, it can make sense to run this order the other way.
A kitchen planned this way is quietly calm to work in. The kettle has its place, the chopping board stays out, and nobody has to stand in front of the hob to reach the fridge.
How to Plan a Kitchen Layout in 7 Steps
Do this on a printed floor plan with a pencil, before the cabinet maker draws anything. If the drawing itself is hard to follow, our guide on how to read a renovation floor plan explains the symbols.
1. Mark everything you can’t move
Draw in the window, doors, the gas point or gas cylinder spot, the existing sink drain and floor trap, the existing power points, columns, beams, and the wall where the cooker hood duct can exit. In condos, also mark the service yard where the washing machine usually sits.
These fixed points decide more of your layout than any style choice. Moving them is possible but costs money, and in condos the Joint Management Body (JMB) or Management Corporation (MC) may restrict it. Check the building’s renovation rules before you plan around a move.
Decide at this stage whether your main hob will be gas or induction, because each depends on a different service. Our guide to gas vs induction hobs and cooker hoods compares the two in more detail.
- Gas — note whether you use a cylinder or piped gas. Piped gas, common in some condos, can only be moved by a competent gas contractor, and the building may restrict it.
- Induction — find the rated power on the hob’s spec sheet. Many larger induction hobs need their own circuit from the distribution board (DB) rather than a normal 13A socket, so ask a registered electrician to confirm the circuit and whether your DB can take it before the layout is fixed.
2. Place the sink first
The sink is the hardest point to move because it’s tied to the water supply and, more importantly, the drain. A drain needs a slope to flow, so the further the sink moves from the existing drain, the more floor or wall has to be hacked to lay a new pipe. Keeping the sink at or near its original spot is the single biggest saving in most kitchen layouts.
3. Place the hob
The hob depends on two things: its supply and the cooker hood duct route. A gas hob should sit within reach of the gas point or cylinder spot; an induction hob needs the power you confirmed in step 1, including any dedicated circuit, brought to that spot. Either way, the shorter and straighter the duct to the outside wall, the better the hood works, so place the hob near that wall where you can. Then check these:
- Not right under a window — wind can blow out a gas flame, and curtains or blinds right beside a hot hob are a fire risk with either type.
- Not tight in a corner — you need room on both sides for pot handles and your elbows.
- Not right next to the fridge — the heat makes the fridge work harder. Keep at least a cabinet’s width between them.
- Not beside a door — someone walking in shouldn’t brush past a hot wok.
4. Place the fridge
Put the fridge at the end of a counter run, near the kitchen entrance, so it’s easy to reach from the dining area. Check which way the door opens: it should swing away from the counter you’ll be putting groceries on, and it shouldn’t hit a wall before it opens far enough to pull out the drawers.
5. Check the triangle and the landing space
If the sink, hob and fridge are in the same room and not all on one wall, draw the triangle between them and compare it against the guideline table above. In a single-wall kitchen, check the order along the run instead. In a split wet and dry kitchen, check the sink, prep counter and hob in the wet kitchen, and the route from the fridge (see the wet and dry section below). Then check the landing space: the clear counter beside each point where you put things down. Common rules of thumb used by kitchen designers:
| Next to | Landing space to plan for |
|---|---|
| Sink | About 600mm on one side and 450mm on the other, for the dish rack and dirty dishes |
| Hob | About 300mm on one side and 400mm on the other, for pots, plates and the spatula |
| Fridge | About 400mm on the handle side, for groceries going in and out |
| Preparation area | About 900mm of continuous counter, ideally between the sink and the hob |
If one side of the hob ends at a wall or a tall cabinet, you lose half your landing space. That’s usually the sign to move the hob or the tall unit, not to accept it.
6. Check the aisles and door swings
The aisle is the walkway in front of the counter. Allow about 1,000mm for one cook, and about 1,200mm where two people cook together or there’s an island. Then imagine the oven door, the dishwasher door and the fridge door open at the same time. If any of them blocks the aisle completely, the layout needs adjusting. For a full list of counter heights, cabinet depths and clearances to check on your designer’s drawings, see our standard home measurements guide.
7. Plan storage and power points last
Only now do you decide where the drawers, wall cabinets and tall units go. Pots and woks go in deep drawers beside the hob, plates near the sink and dish rack, and dry goods near the fridge. Then count power points for every small appliance in its zone, plus two spare, so nothing ends up on an extension cord across a wet counter.
Planning a Layout Around a Wet and Dry Kitchen
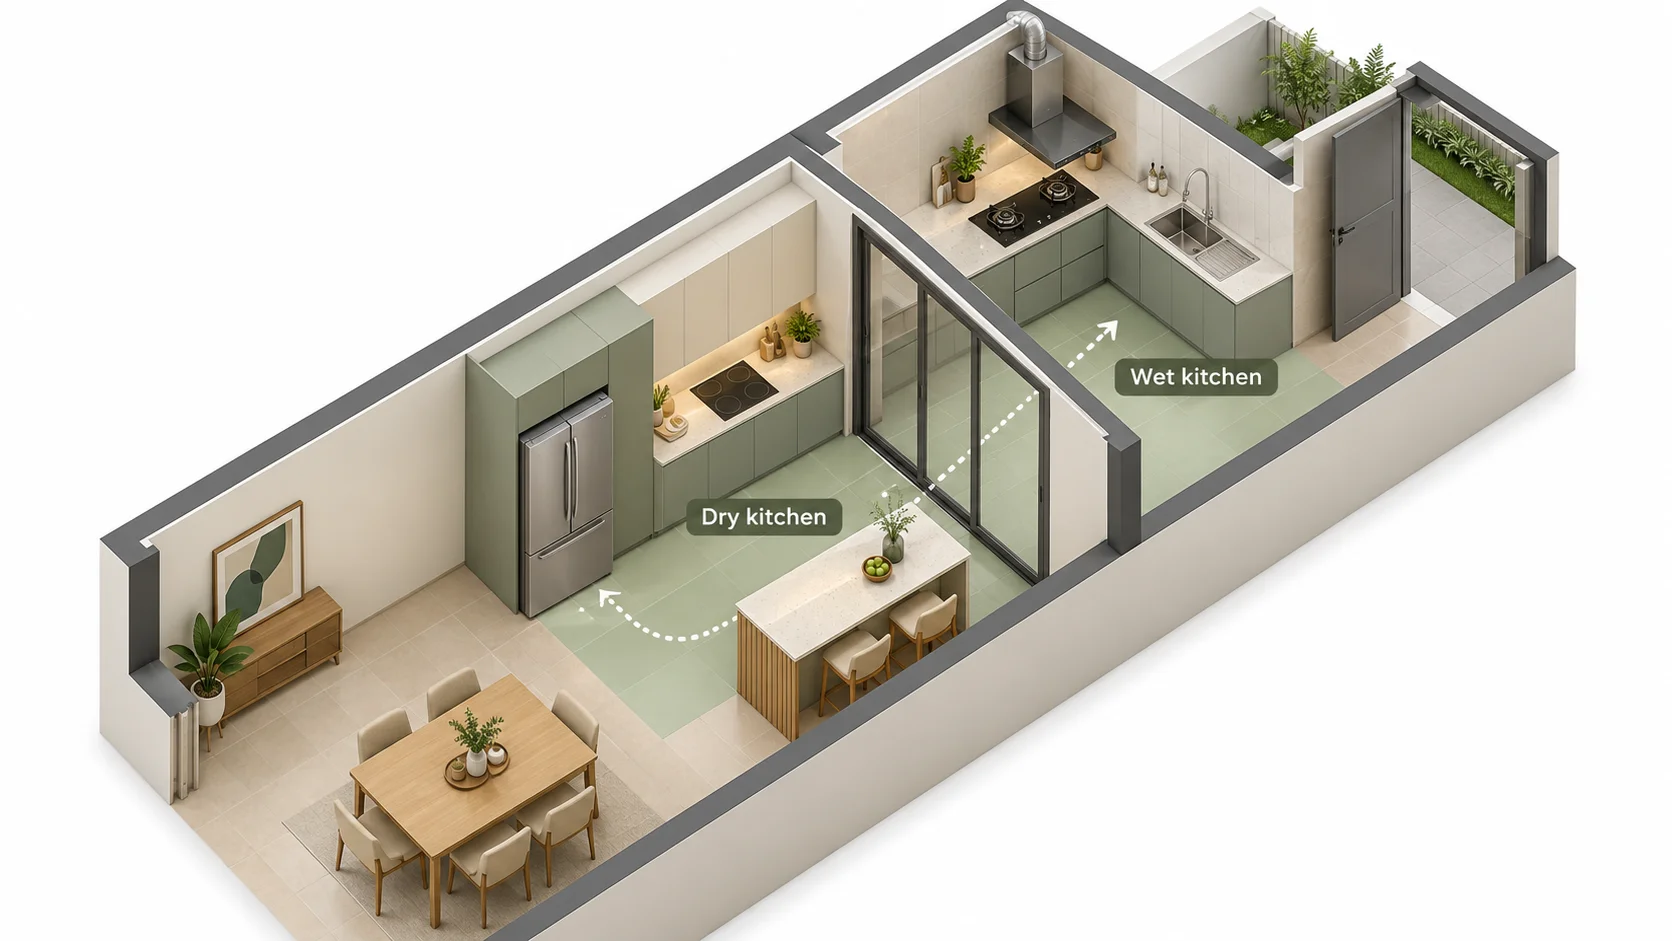
Many Malaysian homes have both: a wet kitchen for heavy cooking with a gas hob and strong hood, and a dry kitchen for light cooking, drinks and breakfast. If that’s your home, plan each one as its own small zone layout rather than forcing one triangle across both.
- Wet kitchen — gas hob, main sink and a strong ducted hood, ideally on an outside wall near the back door or service yard. This is where you’ll stand longest, so what matters most here is the line from sink to prep counter to hob: close together, in the order you cook, with landing space at each. With the fridge usually on the dry side, there’s often no real triangle to draw, so plan a stretch of counter just inside the door for food carried in from the fridge.
- Dry kitchen — fridge, an induction hob or no hob at all, a small sink if you can fit the plumbing, and the small appliance zone. It often faces the dining area, so it’s also where the kitchen is seen.
- The route between them — keep the walk from fridge to wet kitchen short and clear. If you’re adding a glass sliding door between the two, check that it doesn’t open across the path you’ll walk with a full tray.
Whether your home should have one or both is a separate decision. Our comparison of open and closed kitchens in Malaysia walks through cooking smells, condo rules and costs.
Applying the Work Triangle to Each Kitchen Shape
The kitchen renovation guide covers the five common kitchen shapes and what each suits. Here’s how the triangle and zones work in each one:
-
Single-wall (I-shape) — no triangle is possible. Line things up in order: fridge at one end, then the sink, then the longest stretch of prep counter, then the hob. Put tall storage at the end of the run, not in the middle of it.
-
Galley — two parallel runs give you two starting options, and your fixed services usually decide between them.
- Sink and hob on the same run, with prep counter between them and the fridge and tall storage on the opposite run near the entrance. You never turn around with a hot pot or dripping vegetables, but the run needs to be long enough for the sink, about 900mm of prep and landing space on both sides of the hob, and the drain and hood duct both have to reach that wall.
- Sink on one run, hob on the other. This is common when the drain is on one wall and the duct exit on the other, and it can leave each run with more clear counter. The trade-off is that you turn and cross the aisle between washing and cooking, and two people end up back to back. If you go this way, check that the aisle is about 1,000–1,200mm (narrower and you bump into each other, wider and every turn becomes a walk), that there’s landing space beside both the sink and the hob so a pot can go down on either side, that the sink and hob are offset rather than directly opposite if two people cook together, and that no appliance door opens into the aisle you cross with hot food.
-
L-shape — the most natural fit for the triangle. Put the sink on one leg and the hob on the other, keeping both away from the corner, and the fridge at the open end of either leg.
-
U-shape — one point per wall works well, but check the triangle doesn’t get too large in a big landed kitchen. If the sides add up to more than about 7.9m, bring the fridge closer.
-
With an island — the simplest starting option is to use the island for the sink or for prep and serving, and keep the hob on the wall, where the hood sits against the wall and the duct to the outside is usually short. A hob on the island lets the cook face the room, but it needs an island hood hung from the ceiling, a duct run through the false ceiling to an outside wall, and gas piping or a power cable brought to the island, often through the floor. Before you choose an island hob, check:
- whether the ceiling void is deep enough for the duct, and how long the run is and how many bends it has, then ask the hood supplier to confirm the hood’s extraction for that duct length
- where the duct can exit, and whether your JMB or MC allows a new opening on that wall
- how gas or power will reach the island, and what hacking that needs
- that there’s landing space on both sides of the hob and a splash guard or enough counter behind it, since there’s no wall to catch oil, and that stools aren’t within reach of the hob
Whichever you choose, check that the triangle doesn’t cut across the island by more than about 300mm.
What Kitchen Layout Changes Cost
A layout that keeps the sink, gas and hood duct where they are costs the least. Costs climb when the layout adds cabinet length or moves services.
Malaysian cabinet makers price by the foot run: every foot (about 30cm) of cabinet measured along the wall. Base cabinets (under the counter), wall cabinets (hung above it) and tall cabinets (floor to ceiling, such as a pantry or oven tower) each have their own rate, so a wall with base and wall cabinets is charged twice for the same length. Two things then set the price: the configuration, meaning which cabinet types and how many feet of each, which the layout decides; and the material, which changes the rate for every foot.
| Layout decision | What it affects | Reference cost (RM) |
|---|---|---|
| Cabinet rates by type | Cost of each foot run | Entry-level rates start from about RM280 per foot run for base cabinets, RM220 for wall cabinets and RM450 for tall cabinets |
| Changing shape, e.g. L to U | Adds foot run of cabinets | About RM500 for each extra foot of base cabinet with a wall cabinet above (RM280 + RM220), at those entry-level rates |
| Cabinet material | The rate for every foot run | Melamine sits at the low end; plywood costs more per foot run and aluminium more again |
| Moving the hob to a new wall | New hood position and duct route | Chimney hood RM900–4,000 for the unit alone; ducting, wall opening and installation are extra |
| Hacking a non-structural wall to open up the kitchen | Demolition | RM3–20 per sq ft, demolition only; making good and disposal are extra |
| Moving the sink | New water and drainage pipes, often floor hacking | Priced per job; get it as its own line item |
| Moving the gas point | New gas piping by a competent gas contractor | Priced per job; get it as its own line item |
Prices are for reference only, as of October 2026. Your final cost depends on the cabinet material and hardware, the size of the kitchen, how far services move, building rules in your condo, and your contractor’s own rates.
To estimate a layout, add up the feet of each cabinet type on the plan and multiply by its rate. The layout decides the feet; the material decides the rate. That’s why layout shape matters for budget: a compact L-shape with a long, well-placed prep counter often works better than a U-shape with extra cabinets you never fill. The same money can go into better hardware or a stone countertop instead.
For Carpenters and Renovators
Most layout complaints after handover come down to three things: a hob boxed in against a tall unit or wall with no landing space, a fridge door that can’t open past 90 degrees, and too few power points on the prep counter. All three are easy to catch on the plan and expensive to fix once the stone is cut.
Before you finalise the cabinet drawings, draw the triangle on the plan and show the homeowner the open positions of the fridge, oven and dishwasher doors. Ask who the main cook is, whether two people cook together, and whether the main cook is left- or right-handed. Confirm with the JMB or MC before quoting any change to the sink or gas position in a condo, so your price doesn’t depend on an approval you haven’t got.
Before You Approve the Kitchen Layout
- All fixed points are marked: window, doors, gas, drain, floor trap, hood duct exit, beams and columns
- The sink stays at or near its existing drain, or the move is priced as its own line item
- The hob isn’t under a window, in a tight corner, beside the fridge or next to a door
- The hood duct route to the outside wall is short and drawn on the plan
- If the sink, hob and fridge form a triangle in one room, each side is roughly 1.2–2.7m and the total is under about 7.9m
- In a single-wall kitchen, the order along the run is fridge, sink, prep, hob
- In a wet and dry kitchen, the sink, prep counter and hob sit close together in the wet kitchen, with a landing counter by the door for food from the fridge
- Gas or induction is decided, and the gas point or the induction circuit is confirmed for the hob position
- There’s landing space on both sides of the hob and sink, and beside the fridge
- There’s about 900mm of clear prep counter, ideally between the sink and the hob
- The aisle is about 1,000mm for one cook, or 1,200mm for two cooks or an island
- Fridge, oven and dishwasher doors can open fully without blocking each other
- Every small appliance has a counter spot and a power point, with two spare
- For a wet and dry kitchen, the walk between the fridge and the wet kitchen is short and clear
- For condos, the JMB or MC has confirmed any change to the sink, gas or hood position
A kitchen planned this way doesn’t announce itself. You simply notice, a few months in, that dinner comes together without you crossing the room six times, the kettle and rice cooker each have their home, and two people can share the space on a busy Sunday morning without a single “excuse me, can you move?”