 rumaruma
New House Defect Checklist Malaysia: What to Check Before Renovation Starts
A room-by-room defect checklist for new Malaysian homes, plus how to report defects to your developer and get them fixed before your renovation starts.
On this page
- Why the Defect Check Comes Before Renovation
- What Counts as a Defect (and Who Fixes It)
- What to Bring for the Inspection
- The New House Defect Checklist Malaysia, Room by Room
- DIY Inspection or a Professional Inspector?
- How to Submit Your Defect List to the Developer
- What If the Developer Doesn’t Fix It?
- When Can Your Renovation Start?
- For Contractors and Renovators
- Your Pre-Renovation Defect Checklist
The keys are in your hand, the unit smells of fresh paint, and your contractor wants to start hacking next week. The walls look fine and the tiles look fine. But tapping can reveal tiles that need a closer look, and a bathroom floor that drains the wrong way may look fine until you run water over it. This new house defect checklist for Malaysia walks you through what to check, room by room, and how to report defects for the developer to assess and repair under your contract before renovation covers them up.
As a starting point, allow half a day for a condo and a full day for a landed house. Larger homes, limited access or follow-up checks may need more time.
Why the Defect Check Comes Before Renovation
Under the prescribed Schedule G and Schedule H housing contracts, the defect liability period (DLP) is 24 months after the purchaser takes vacant possession. Qualifying defects caused by defective workmanship or materials, or departures from the approved contractual plans and specifications, must be repaired at the developer’s cost within 30 days of receiving written notice. These terms appear in the standard housing contracts; check the version in your sale and purchase agreement (S&P), including its rules on when vacant possession is deemed to have been taken. Don’t assume the clock starts on the day you physically collect your keys.
The federal housing-contract and tribunal guidance below concerns qualifying developments in Peninsular Malaysia and Labuan. Sabah and Sarawak have separate housing laws and procedures: check your S&P and the relevant state housing authority before relying on the deadlines or remedies described here.
The catch is proof. Once your contractor has tiled over a suspect floor, repainted a cracked wall or boxed up a leaking pipe, it can become harder to establish the original condition and cause of the problem. This can complicate a claim, especially if renovation also causes damage. Starting work before documenting defects is an avoidable example of the renovation mistakes Malaysians make.
If you’ve only just collected your keys, the key collection checklist covers the documents, utility accounts and building-management steps to sort out alongside this inspection.
What Counts as a Defect (and Who Fixes It)
For a DLP claim, the key questions are whether the problem results from defective workmanship or materials, or whether the home departs from the approved contractual plans and specifications. Record suspected defects for assessment. A personal preference or damage caused during renovation is a different matter.
| Problem | Usually fixed by | Notes |
|---|---|---|
| Cracks, hollow-sounding tiles, leaks, faulty wiring or plumbing inside your unit | Developer, where covered by the S&P | Record and report within the applicable DLP; suspected defects may need assessment |
| Items in the S&P that are missing or different (e.g. wrong tile, missing power point) | Developer | Quote the clause or plan in your list |
| Defects in common property (lift lobby, corridor, shared roof, facade) | Developer for qualifying construction defects | Notify the developer and current management body in writing; this may be developer management, the JMB or the MC |
| Damage caused by your contractor or movers | You | Why the before-photos matter |
| Things you’d simply prefer to be different (tile colour, socket position) | You | Leave these off the defect list |
Record hairline cracks in plaster rather than assuming they are harmless or deciding the repair method yourself. Wide cracks, cracks running diagonally from window corners, or cracks that keep growing need more than a tape marker. Photograph and report them promptly, and ask the developer to arrange a qualified assessment before renovation affects that area.
What to Bring for the Inspection
You can start with basic items you already own or can buy from a hardware shop. Prices vary by brand and specification; check the cost of the whole kit before buying.
- Coloured masking tape and a marker, to mark and number each defect
- A socket tester suitable for Malaysian 13A three-pin outlets, with its instructions and indicator chart, for initial checks of compatible sockets
- A bright torch, for spotting uneven walls and ceiling stains
- A coin, car key or small rubber mallet, for tapping tiles
- A spirit level and measuring tape
- A small ball or marble, for checking floor falls
- A pail, for running water tests
- A fully charged phone for photos; a charger can show that a compatible socket supplies power, but cannot establish electrical safety
- A printed floor plan, to note where each defect is
Do the inspection in daylight with the power and water already connected. You can’t test plumbing or electrical points without them.
The New House Defect Checklist Malaysia, Room by Room
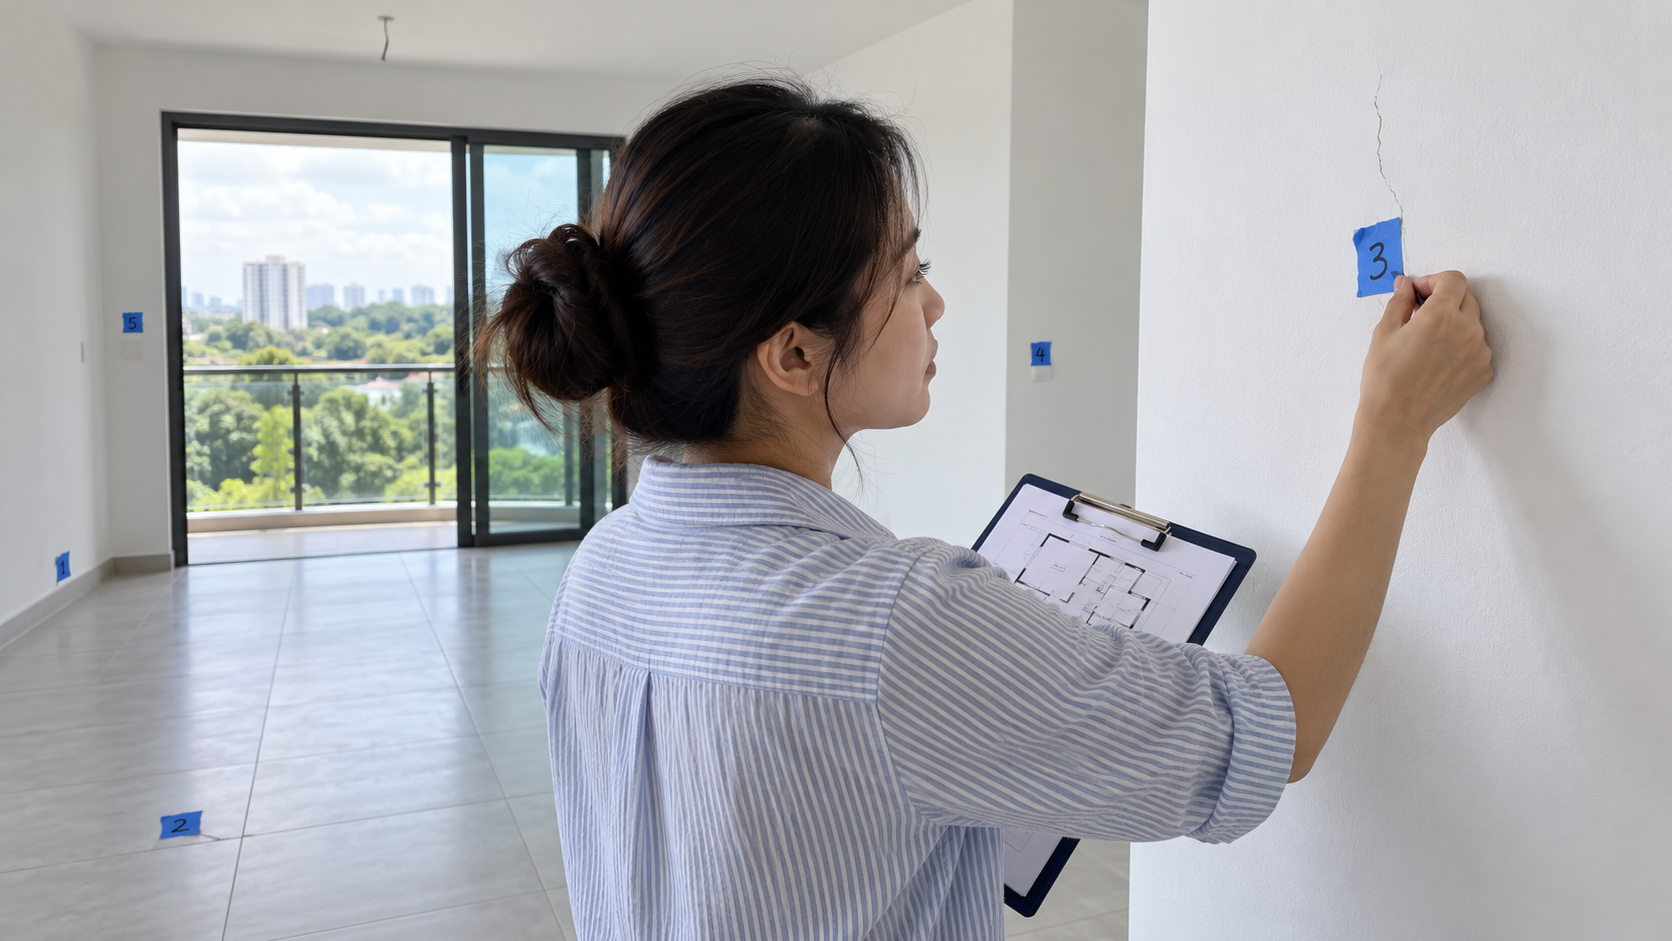
Work through the unit in the same order every time, one room at a time, so nothing is skipped. Mark each defect with a strip of tape and a number, then photograph it with the number visible.
Walls and Ceilings
- Cracks in walls and ceilings, especially at window and door corners and where walls meet beams
- Uneven or patchy paint, drips, and areas where the undercoat shows through
- Walls that aren’t straight. Shine a torch along the wall at a low angle and dips and bumps show up as shadows
- Water stains or damp patches on the ceiling, which can mean a leak from the unit or roof above
- Damp or bubbling paint low on the walls, which can mean rising damp or a leaking pipe inside the wall
- Gaps or cracks along the ceiling cornice and around ceiling access panels
Floor and Wall Tiles
Gently tap floor tiles, including the corners, and listen for differences between nearby areas. A hollow sound can indicate a void or bonding issue, but the sound also depends on the installation system. Tapping alone cannot confirm the cause or predict failure: the Tile Council of North America explains that hollow sounds do not necessarily mean a floor will fail.
- Hollow-sounding tiles, especially at corners and edges
- Cracked, chipped or scratched tiles
- Lippage, where one tile edge sits higher than the next and catches your foot
- Uneven or missing grout, and grout lines that wander
- Tiles that don’t match the S&P specification, or obviously mismatched batches
Mark hollow-sounding areas with tape so the developer’s contractor can locate and assess them. Ask for the findings and proposed remedy rather than assuming every marked tile must be lifted. Small chips and holes are sometimes repaired rather than replaced; the tile repair guide explains when a repair is acceptable.

Doors and Windows
- Every door opens, closes and locks smoothly without scraping the floor or frame
- Gaps between door and frame are even all the way round
- Door hinges are tight, and the main door lock works with every key you were given
- Windows and sliding doors open and lock properly, and the rollers run smoothly
- Window seals are complete, with no gaps in the sealant around the frame
- No cracked or scratched glass
- Grilles, if supplied, are firmly fixed
Window leaks may become apparent during wind-driven rain. Revisit after rain where possible, checking the sills, the wall below each window and the floor for water marks. If leakage is suspected but conditions are dry, ask the developer or inspector whether a professional water test is appropriate; don’t lean outside or attempt exterior spraying yourself.
Bathrooms
Concealed waterproofing defects can be costly and disruptive to repair, especially if tiles need to be removed. But a leaking pipe joint and a failed waterproofing layer need different remedies. Ask for the source to be established before agreeing to a repair method; some leaks can be treated without removing the tiled finish.
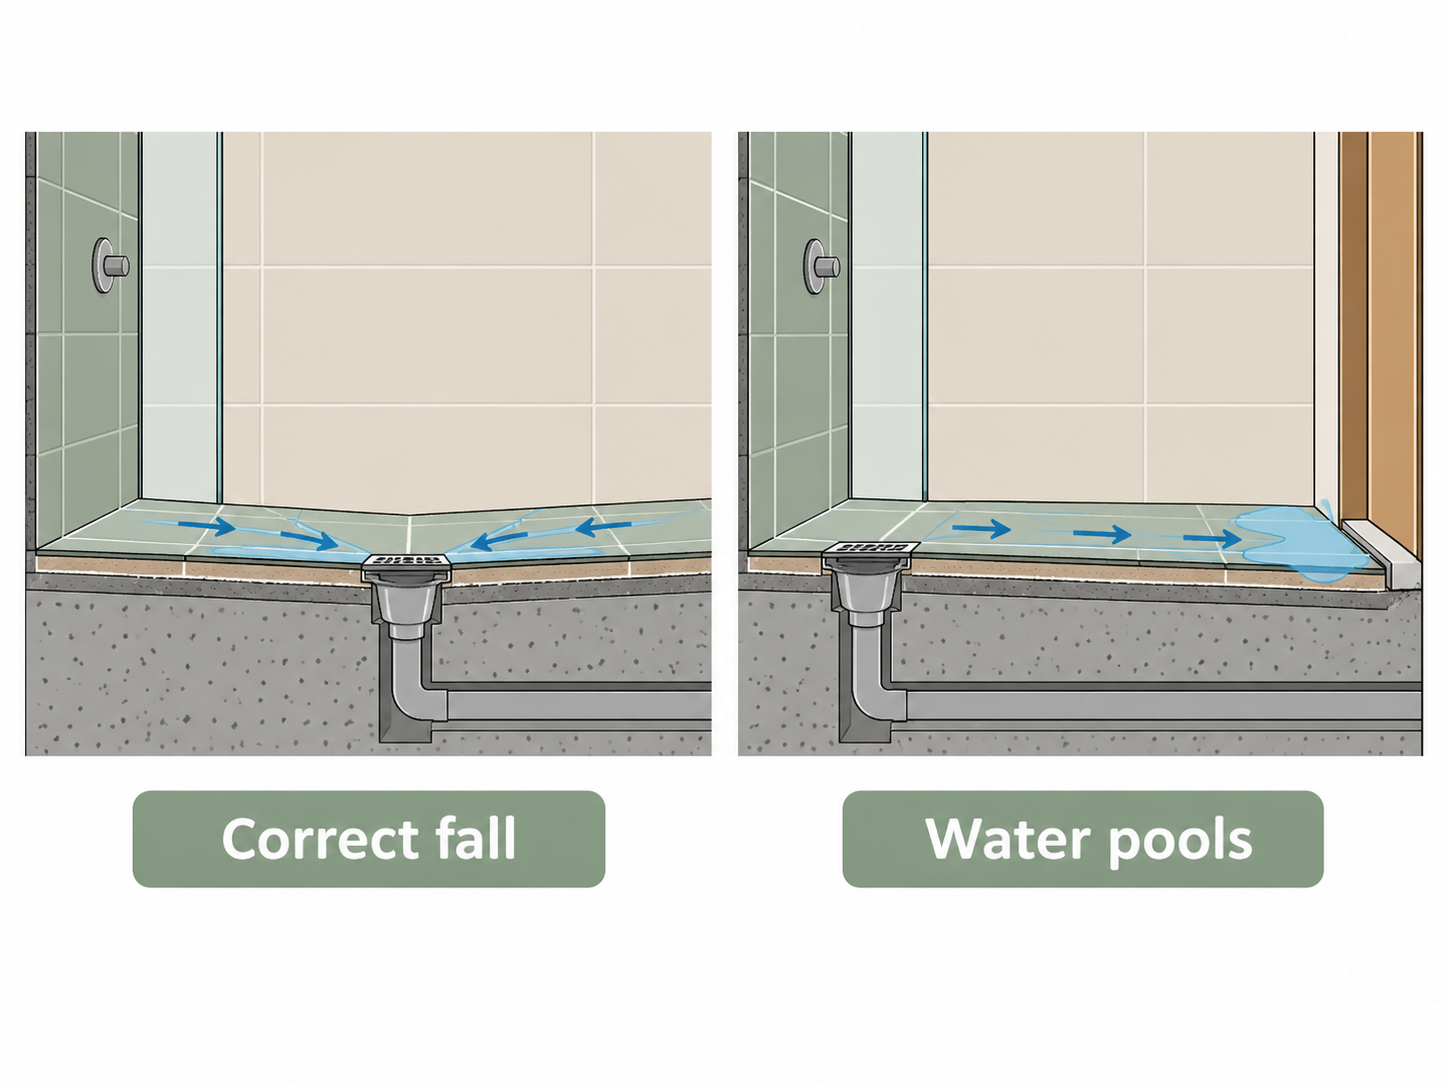
- Floor slopes towards the floor trap. Pour a pail of water and watch where it goes: it should drain away, not pool in corners or flow towards the door
- Floor trap and shower drain flow quickly with no gurgling or smell
- Taps, shower mixer and bidet spray work, with steady pressure and no drips
- Toilet flushes properly, refills fully and doesn’t keep running
- No water leaking under the basin; check the pipe joints with a dry tissue
- Silicone around the basin, toilet and shower screen is complete, with no gaps
- Water heater point and its isolator switch are where the plan says
- Exhaust fan, if supplied, works
This quick water-flow check tests drainage direction, not waterproofing integrity. Don’t block drains or leave a bathroom flooded as a DIY test; arrange any separate waterproofing test through the developer or a qualified inspector.
In a condo, ask the owner of the unit below, through management where needed, whether they’ve seen water stains on their bathroom ceiling. Such stains can be a clue to a leak, but their absence does not prove your bathroom is watertight. The source needs assessment.
Kitchen and Yard
- Sink drains quickly and the pipe under it doesn’t leak
- Floor trap in the kitchen and yard drains properly
- Washing machine tap and drainage point work
- Gas pipe point (if supplied) is sealed and capped
- Power points for the fridge, hob and hood are where the plan shows them
Electrical Points
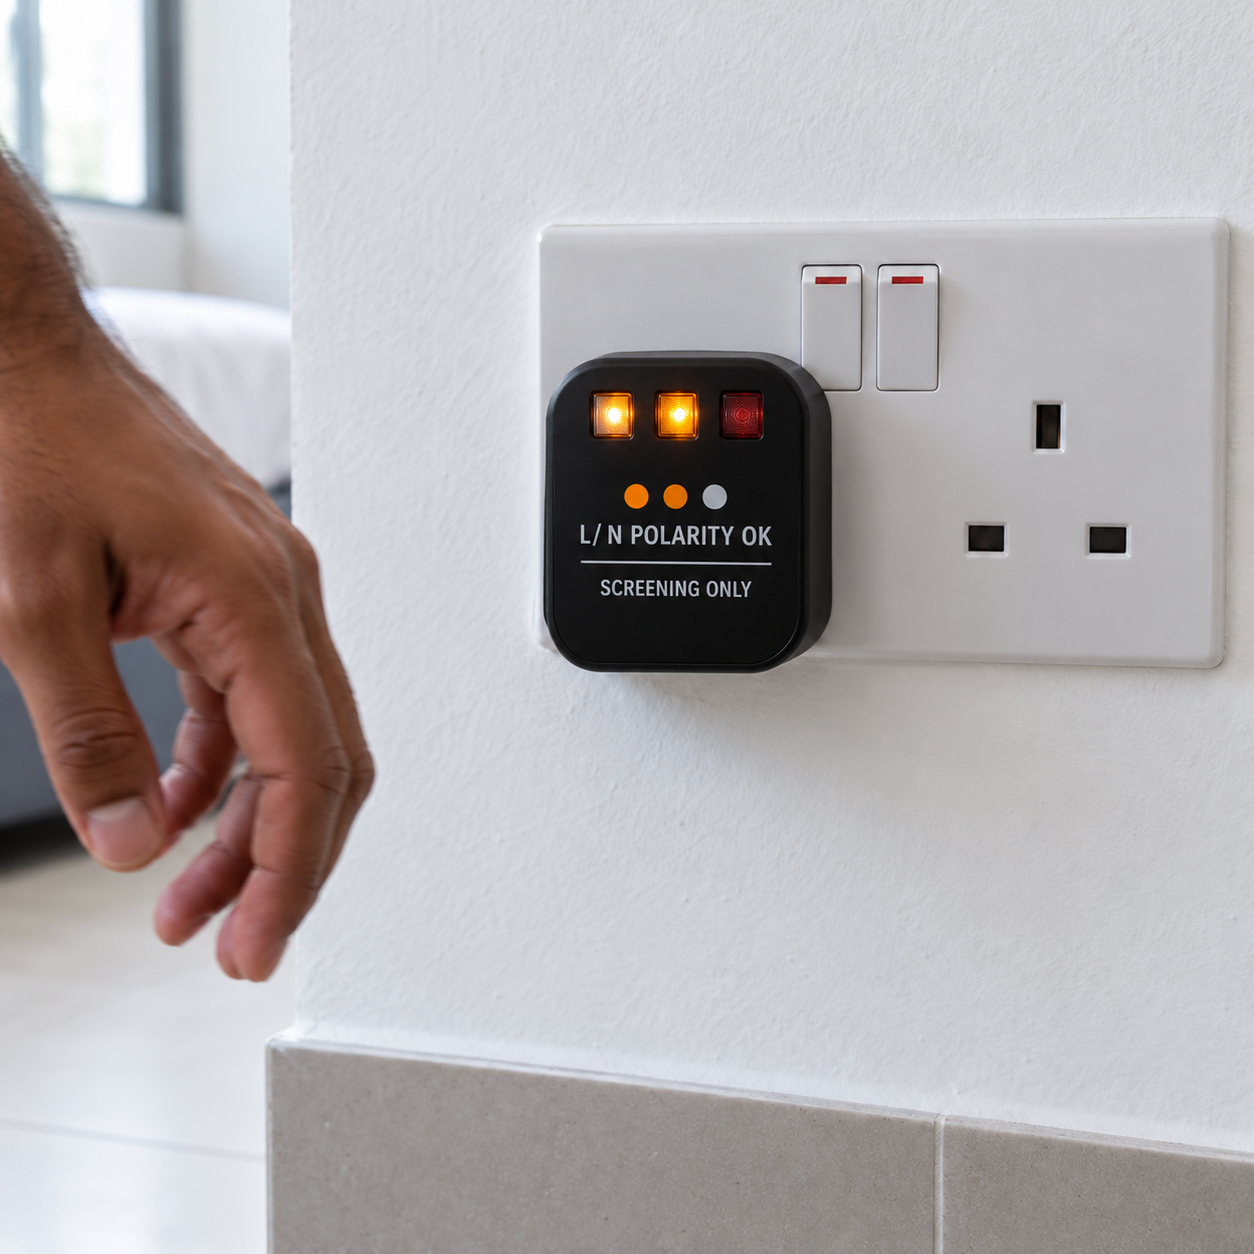
- Use the socket tester only on compatible, dry, undamaged sockets, following its instructions and indicator chart. Depending on the model, it can indicate certain common faults, such as a missing earth or reversed live and neutral; a normal result is not proof of electrical safety
- Every light point works with its switch
- Every switch and socket faceplate is level and firmly fixed
- The distribution board (DB) is labelled. Following the device’s instructions, disconnect sensitive appliances before pressing the residual current device (RCD/RCCB) test button. It should trip and disconnect its protected circuits, which may not include the whole home. If it fails to trip, stop and arrange a check by a registered electrical contractor
- Aircon points, data points and TV points are where the plan shows them
- Doorbell, intercom and the access card reader work
A button test checks the RCD’s operation; it does not replace an electrician’s tests of trip time, sensitivity or the wider installation. Schneider Electric’s RCD guide distinguishes these checks. After a successful button test, restore the device according to its instructions.
Count the points against the floor plan in your S&P. A missing power point is a defect; a socket you’d simply like somewhere else is a renovation job. If your floor plan’s symbols are confusing, see how to read a renovation floor plan.
Balcony and Landed House Extras
Check the roof and gutters only from the ground or another safely accessible viewpoint. Don’t climb onto the roof or lean out of windows or over balcony railings; ask for a professional inspection of areas you cannot see safely.
- Balcony floor slopes away from the sliding door towards the drain
- Balcony railings are firm and the glass panels, if any, are uncracked
- For landed homes: roof tiles intact, gutters and downpipes connected, no ceiling stains in the top floor rooms
- Perimeter drains are clear and the concrete apron around the house isn’t cracked or sinking
- Gate, fence and boundary walls are straight and firmly fixed
- Car porch floor is even, with no pooling after rain
DIY Inspection or a Professional Inspector?
Use this checklist for an initial inspection of visible and safely accessible items. It cannot confirm the condition of hidden wiring, waterproofing or structural elements. A professional defect inspector is worth paying for when the unit is large, when you can’t be there in person, or when you want a formal report with measurements to give the developer. Ask whether any concerning findings need a separate assessment by a qualified specialist.
Get written quotations based on your property’s size, type and location. Compare the inspection scope, access limits, any water or electrical tests, report delivery date, travel charges and reinspection fees. Ask for a sample numbered report with photos and check the inspector’s relevant experience and qualifications.
Ask which tools and tests are included and who performs them. Moisture meters and thermal cameras may help investigate dampness, but equipment alone does not establish inspection quality. Thermal images show temperature patterns, and suspected moisture needs confirmation, as FLIR’s guidance explains. Agree on the report deadline before booking so you can review it before renovation starts.
When to Stop and Get Help
- Concerning cracks: Report wide, growing or diagonal cracks promptly and request an assessment by a qualified building professional, such as a structural engineer where appropriate. Keep renovation away from the affected area until it has been assessed.
- Suspected electrical faults: If a tester indicates a fault, or you notice a damaged socket, burning smell, sparks or repeated tripping, stop testing and avoid using the affected point or circuit. Report it and ask the developer to arrange a qualified electrician. Don’t remove covers, touch wiring or repeatedly reset a tripping device. A normal socket-tester result does not confirm that the whole installation is safe.
- Significant or recurring leaks: Stop the water test, keep clear of wet electrical fittings and report the leak promptly. Ask the developer to arrange a qualified assessment of the source before covering or renovating the affected area. Don’t keep adding water to demonstrate an already visible leak.
How to Submit Your Defect List to the Developer
The way you submit the list decides how well it holds up if there’s a dispute later.
- Check the written-notice requirements in your S&P. Use the developer’s defect form or portal where provided and attach your numbered photo list. If the contract requires a particular delivery method or address, follow it as well; don’t assume a portal entry alone satisfies every notice requirement.
- Number every defect to match the tape on site, with the room and a one-line description, e.g. “12. Master bathroom: floor ponds near door, does not drain to floor trap.”
- Attach dated photos with the tape number visible.
- Get proof of submission. An acknowledgement stamp, a portal reference number or a dated email reply all work. The 30-day repair period starts when the developer receives your notice.
- Be there for the repairs, or arrange for someone to be there. Check each repair against the original complaint before you sign it off, and don’t sign a blanket “all defects rectified” form if some items aren’t done.
A fresh coat of paint or new sealant alone doesn’t show that the underlying problem is fixed. Repeat the relevant safe check: pour water again to check a repaired floor fall, run repaired taps and drains while checking accessible joints for leaks, and open and close a repaired door. For electrical faults, ask for confirmation from the qualified electrician of what was repaired and tested; don’t inspect the wiring yourself. If a problem only appears during rain, record that it still needs checking in those conditions before accepting it as resolved. Save dated photos and any repair or test records alongside the original defect number.
Report newly discovered defects promptly within your applicable DLP using the required written-notice process. Keep a second list for anything that appears after you move in, such as a leak during the first monsoon.

What If the Developer Doesn’t Fix It?
If the initial 30-day repair period passes without the defects being made good, keep your correspondence and follow the remedy in your S&P. Under the standard Schedule G and H clauses, the process includes two stages:
- Initial written defect notice: The developer has 30 days after receiving it to make good qualifying defects.
- Cost and intention notice: If the defects remain after that period, notify the developer of the repair costs and your intention to arrange the work. Give the developer a further 30-day opportunity to carry out the repairs from that notice before proceeding under the clause.
Keep quotations, proof of delivery, before-and-after photos and receipts. Check your exact contract and the procedure involving any money still held by the stakeholder solicitor before commissioning repairs or seeking reimbursement. A reminder alone should not be treated as a substitute for the required cost and intention notice.
For an eligible dispute in Peninsular Malaysia or Labuan, consider the Tribunal for Homebuyer Claims (Tribunal Tuntutan Pembeli Rumah, or TTPR) under KPKT. Its ordinary limit is RM50,000 per claim; a higher claim requires both parties’ written agreement to the tribunal’s jurisdiction. Technical defect claims must be filed no later than 12 months after the contractual DLP ends. This filing deadline is separate from the deadline for reporting defects. See KPKT’s tribunal FAQ. The filing checklist states a RM10 registration fee. Parties generally present their own cases; lawyer representation requires exceptional permission.
For common-property defects, notify the developer and the current management body in writing. The Joint Management Body (JMB) or Management Corporation (MC), where established, can coordinate building-wide evidence and repairs. If the matter stalls, ask the local Commissioner of Buildings (COB) about the applicable common-property defect procedure. Don’t assume that a JMB already exists when keys are handed over.
When Can Your Renovation Start?
You may be able to start work in unaffected areas while repairs elsewhere remain open, but a submitted defect list is not blanket clearance to renovate. Confirm the developer’s repair access, any inspection hold points and the renovation requirements in your S&P and building rules. Ask your contractor to keep work away from unresolved defects and any connected areas that could be disturbed or concealed.
Tell your contractor which areas are off limits until the developer has finished. A bathroom with a drainage problem shouldn’t be retiled until it’s been fixed, but a bedroom with a patched ceiling crack can usually go ahead once the repair is signed off. Build the waiting time into your schedule: the renovation timeline guide shows where defect repairs fit before hacking and M&E works begin.
For Contractors and Renovators
On a new unit, take your own condition photos before you start: every wall, floor, ceiling, door and window, with a date. Ask the owner for a copy of their submitted defect list and the developer’s acknowledgement. If the owner hasn’t submitted one, advise them to do it before you start, and put that advice in writing.
Before repairing a suspected developer defect, agree on the scope and responsibility with the owner in writing. Working on it can obscure the original evidence, complicate a claim or cause additional damage; it does not automatically transfer every pre-existing defect to you. If the owner wants to arrange the repair, check that the contractual notice process has been followed where reimbursement is intended. Quote the work separately, document the original condition, and state what your repair and warranty cover.
Your Pre-Renovation Defect Checklist
Before you give your contractor the go-ahead:
- Every room inspected, with defects taped, numbered and photographed
- Defect list submitted using the required written-notice process, with proof of delivery
- Copy of the list and photos saved somewhere other than your phone
- Repair dates agreed with the developer, and someone available to give them access
- Each completed repair checked against the original complaint, with safe checks repeated and specialist confirmation obtained where needed before signing off
- Contractor told which areas are off limits until repairs are done
- DLP end date in your calendar, with a reminder two months before
Time spent recording defects before renovation makes it easier to show what was already there. Keep the evidence, follow the notice process and check the repairs before covering the affected areas. A first inspection is a useful starting point; unresolved faults still need assessment and follow-up.